 support@vu.city
VU.CITY Website
 Log in
Log in
Log in
As the title suggests, VU.CITY 3D is available for installation on Windows devices only. If you are using a non-Windows device, stream VU.CITY Cloud instead.
Sign into VU.CITY Hub, and look for the 'VU.CITY Desktop' option in the 'Settings' menu:
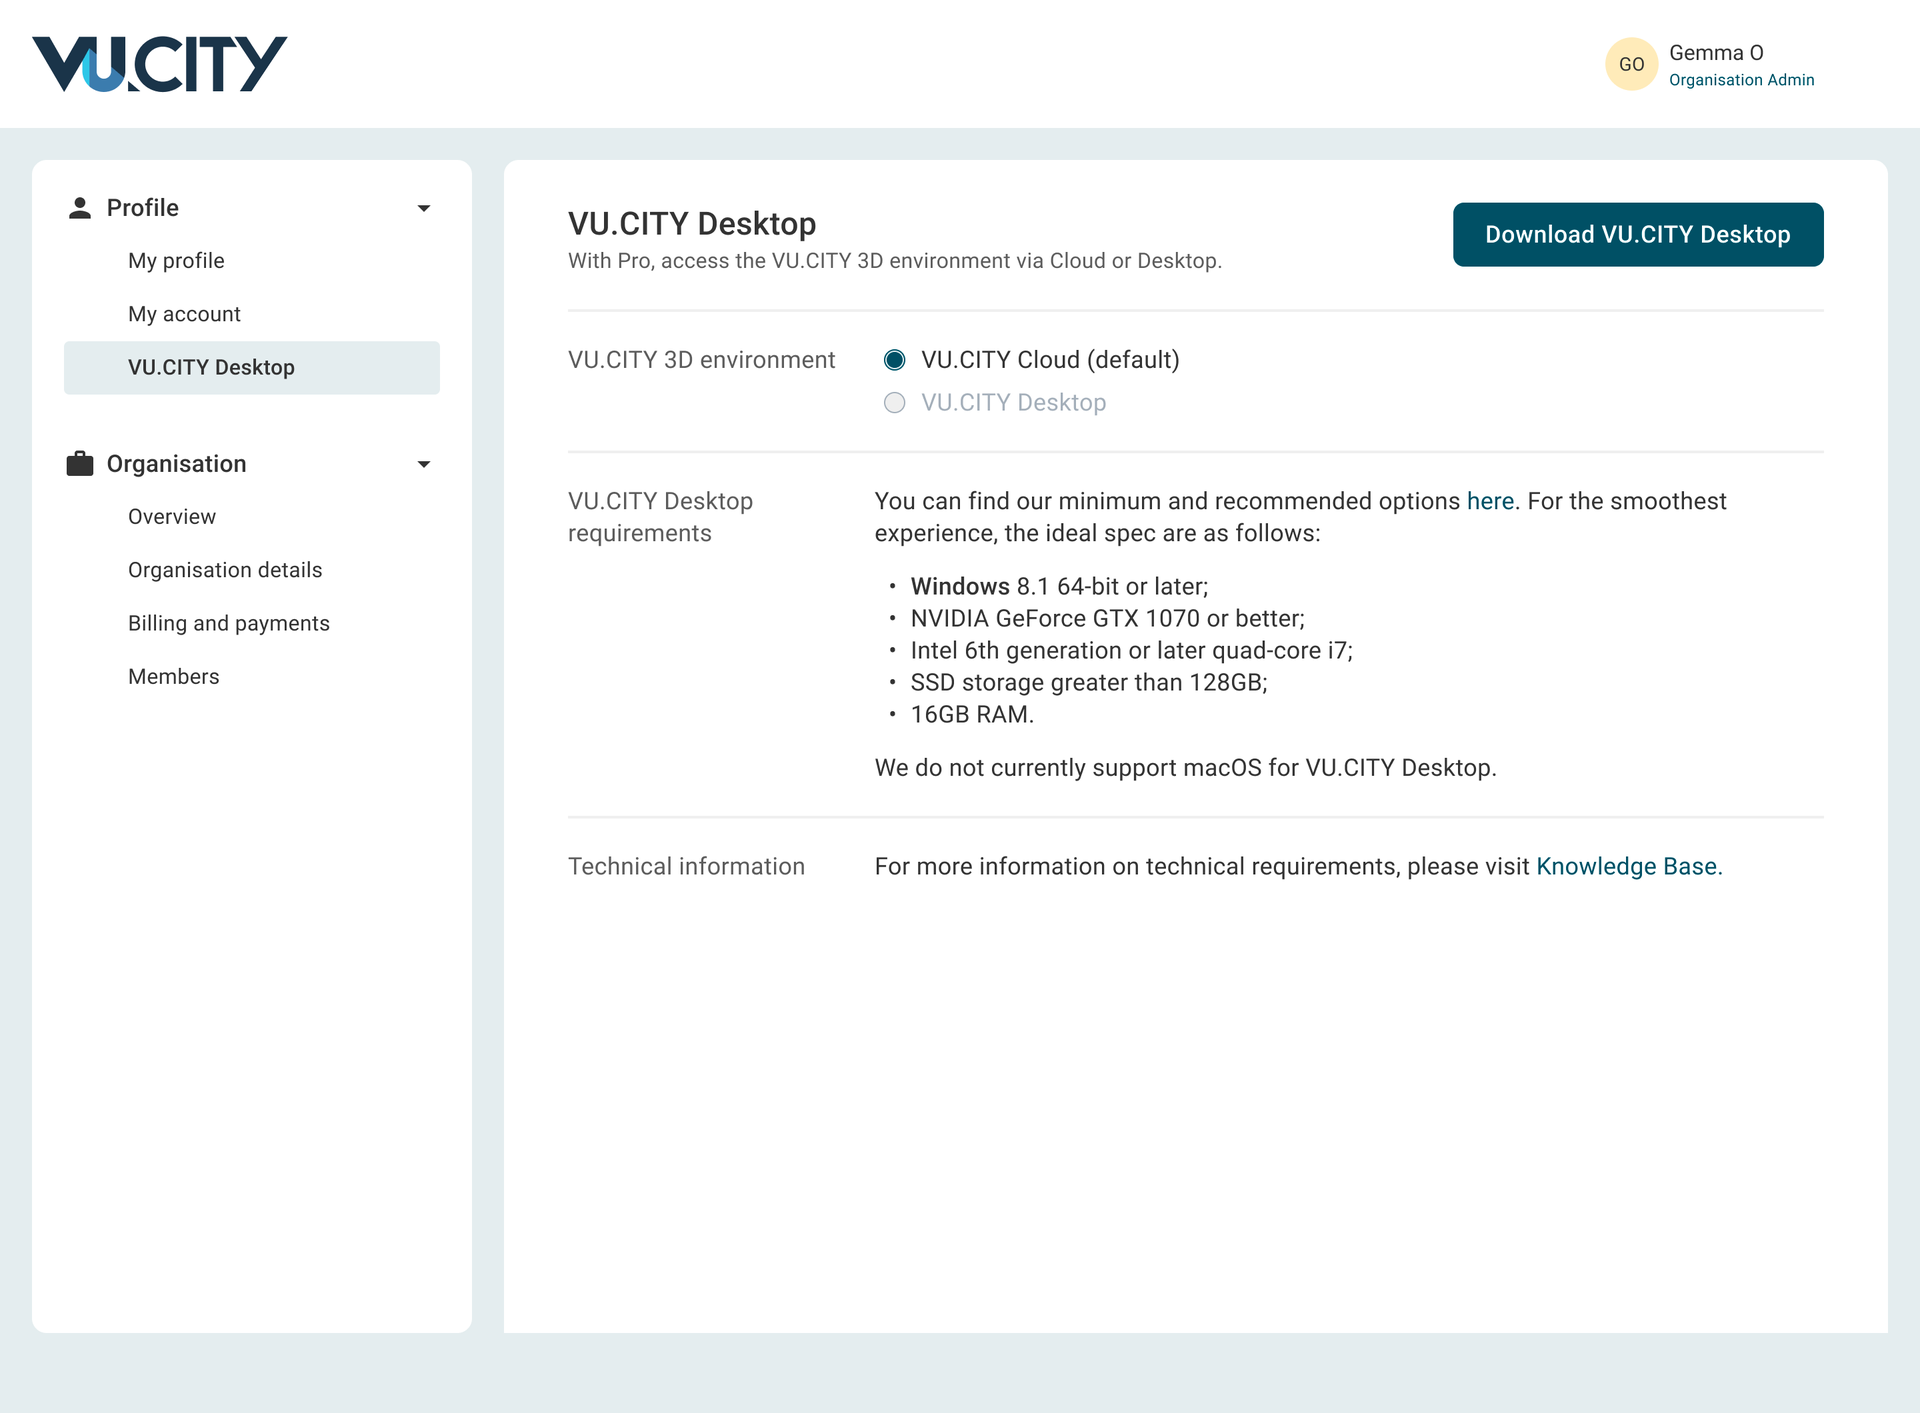
From this menu, you can also set whether to load VU.CITY Cloud by default when accessing VU.CITY 3D, or if you would prefer to launch the Desktop agent instead.
Open any project in VU.CITY Hub, click on the 'Launch 3D' button, and you will be presented with the following screen:

In the above image, VU.CITY Cloud is set as the default launch agent, hence at the bottom of the popup box, you see the option to switch to VU.CITY Desktop. These options will swap depending on your default settings.
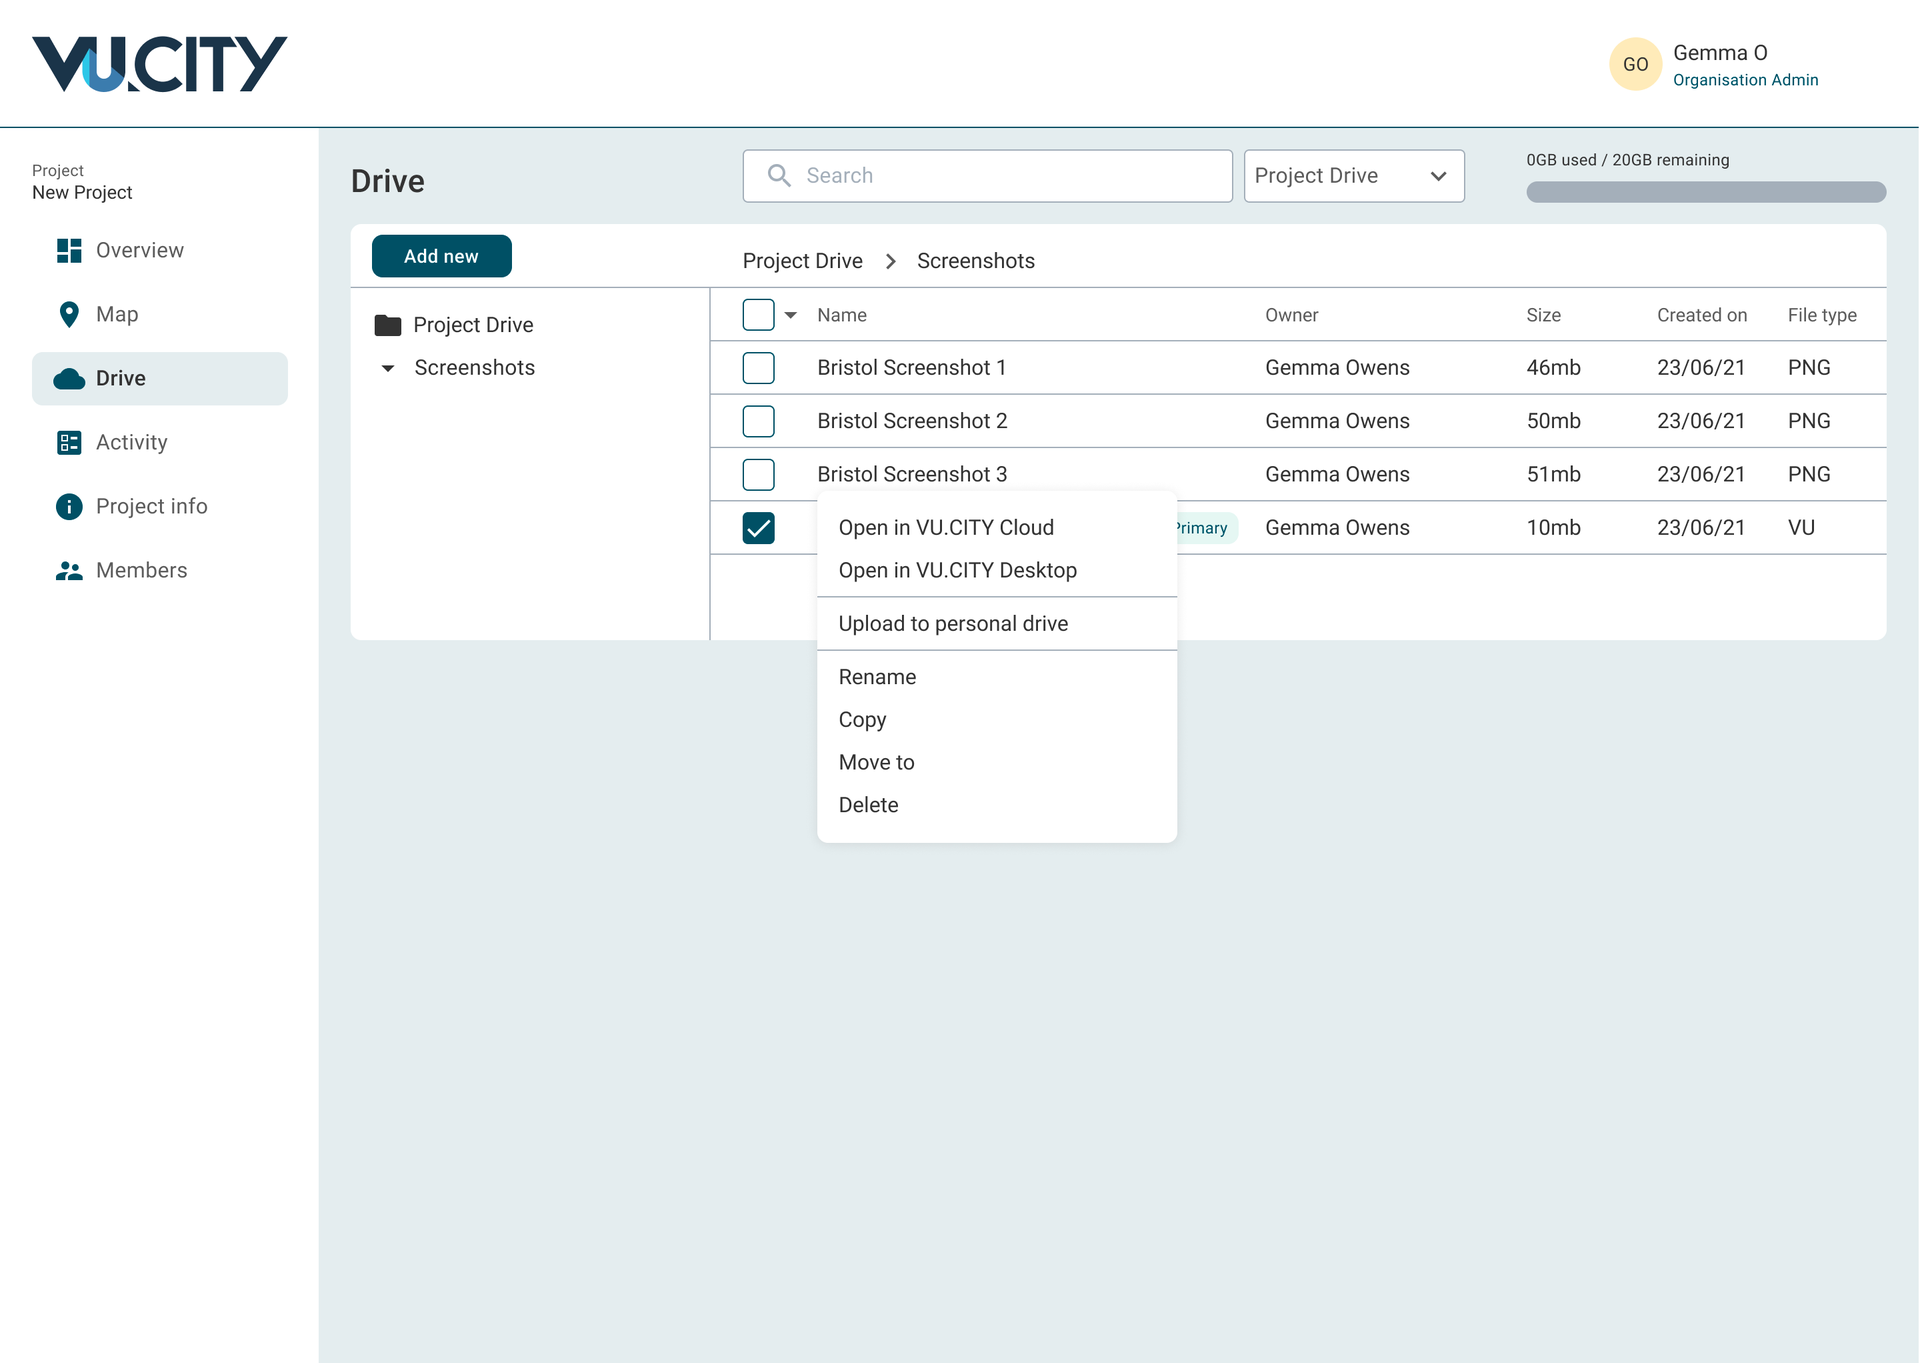
Go to the Drive in any Hub project, and right-click on a ".vu" file to reveal the following options:
You may only have one 3D session active at a time. If you see the following alert, you may have another session running in the background or on another device:

You can chose to force your other session to end by choosing the 'Yes' option.
The assets VU.CITY Desktop uses to create the 3D environment need to be stored locally on your device. If you do not have the necessary assets when launching VU.CITY Desktop, you will be greeted with the following message:
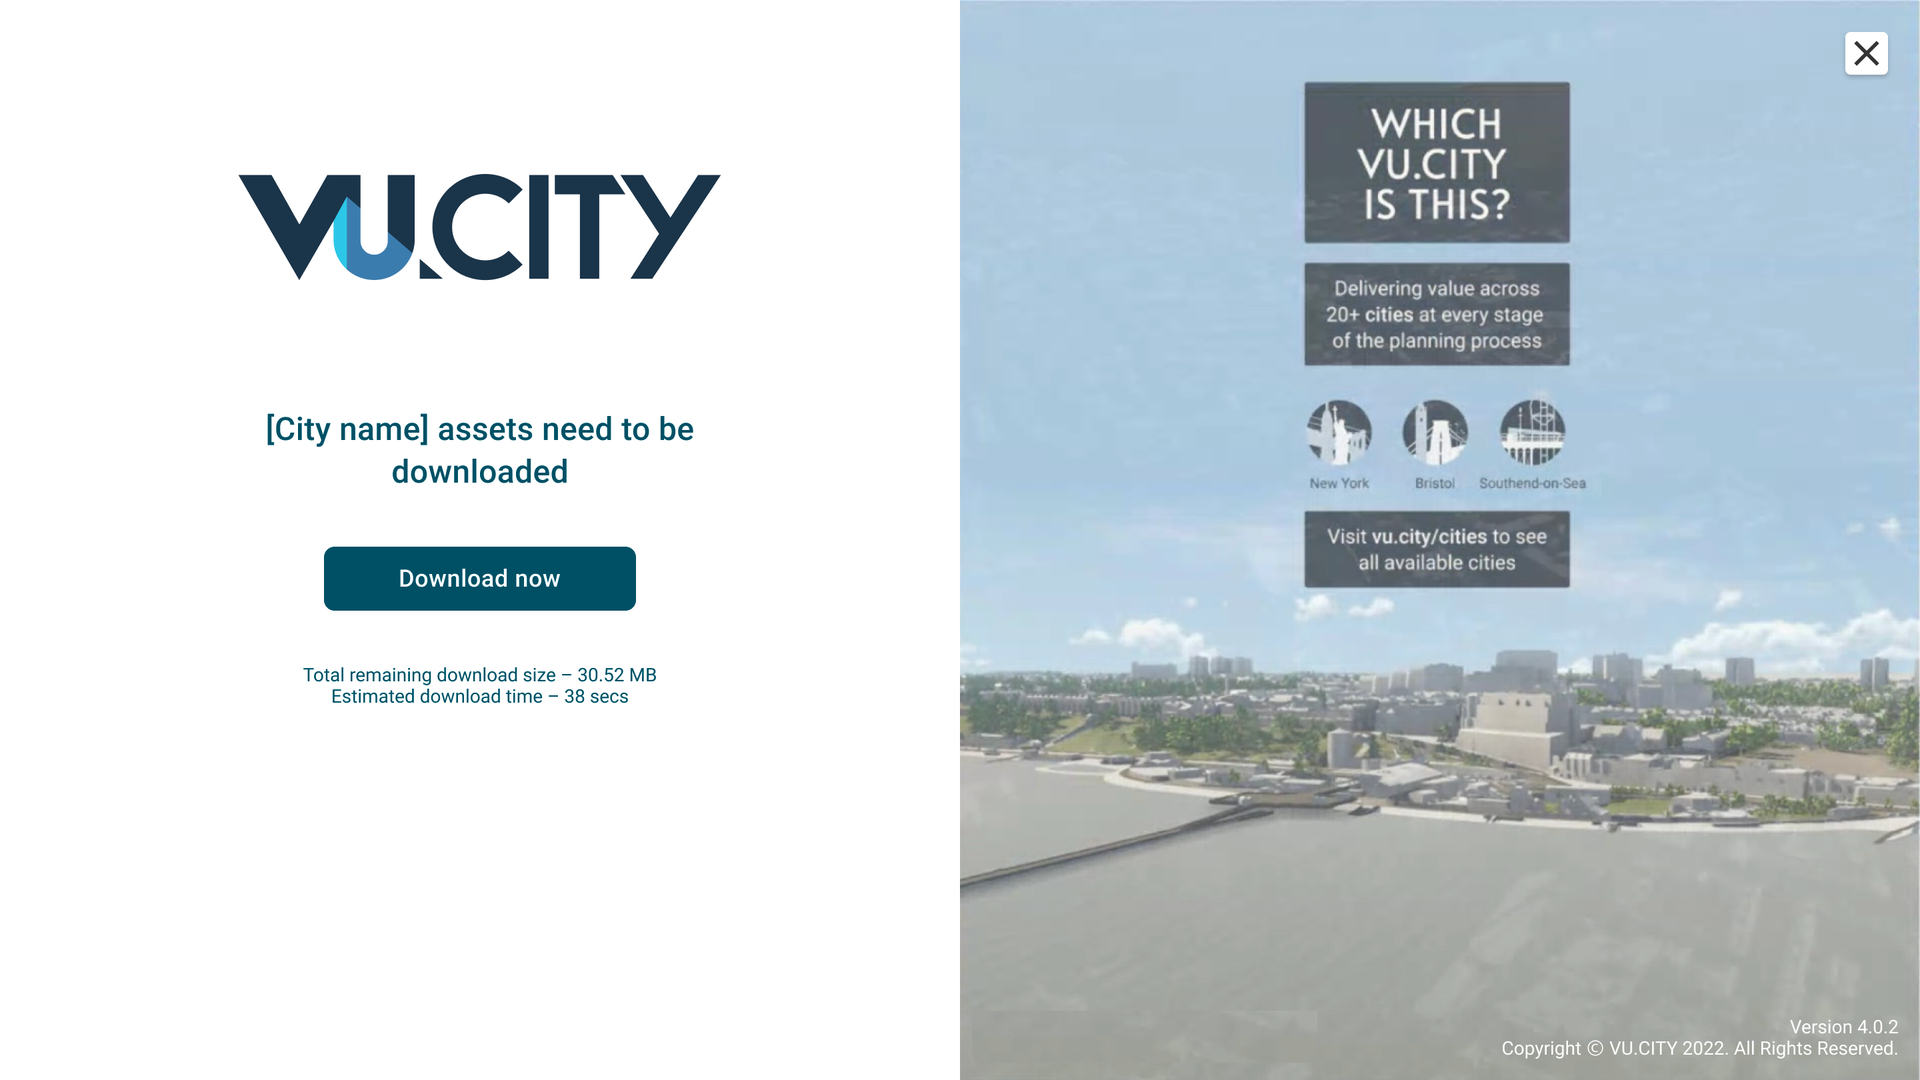
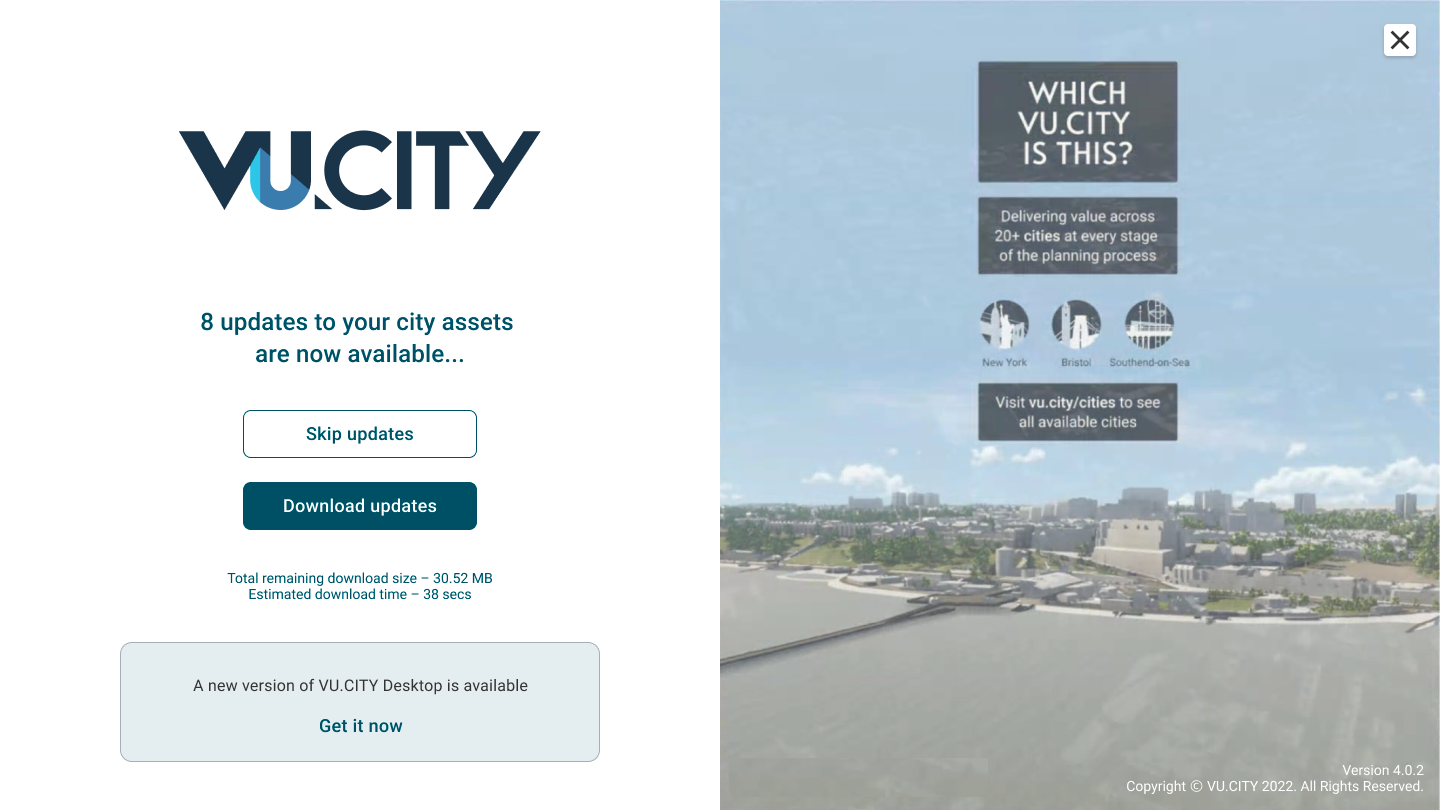
You must download assets the first time you use VU.CITY Desktop. Once downloaded, subsequent updates are optional, though we recommend you install them as you go:

Privacy Policy
|
Cookie Policy
© 2024 All rights reserved VU.CITY Limited


